Set Up Google Analytics 4 For Shopify Involvz

How To Set Up Google Analytics 4 For Shopify

Exciting news! You have the opportunity to enhance the tracking and reporting capabilities of your Shopify ecommerce website by setting up Google Analytics 4 (GA4). With the standard Universal Analytics properties ceasing data processing after July 1, 2023, it becomes even more vital to make the transition to GA4 as soon as possible.

GA4 represents Google’s latest generation of Analytics, enabling you to capture event-based data from both websites and applications simultaneously. By implementing GA4 correctly on your Shopify store, you’ll access invaluable insights into customer behavior, elevate your e-commerce tracking capabilities, and unlock a host of powerful reporting features.

How to Properly Set Up GA4 on Shopify Store?

Many businesses find Google Channels App highly useful for integrating GA4 into the Shopify Store. Once you connect the GA4 property using this app, a tracking process seamlessly applies to your store. As a result, your GA4 property automatically starts tracking ecommerce events without requiring any additional setup. Additionally, the app takes care of automatically setting the e-commerce data layers for the store you own.

When a Google Channels App is used for Shopify, it automatically monitors and tracks the given ecommerce events:

  1. add_to_cart
  2. add_payment_info
  3. purchase
  4. begin_checkout
  5. view_item

Nevertheless,

When a Google Channels App is used for Shopify, it does not automatically monitors and tracks the given ecommerce events:

  1. remove_from_cart 
  2. select_item
  3. add_shipping_info
  4. view_cart
  5. view_item_list
  6. select_promotion
  7. view_promotion

Given the limitations of the Google Channels App, it is not sufficient for achieving a complete Google Analytics 4 tracking setup. To ensure a comprehensive solution, it is advisable to use GTM independently on the Shopify stores.

Through Google Tag Manager, you have the flexibility to set up a GA4 configuration tag and include all the necessary ecommerce events and further tags. 

Businesses typically create and utilize their ecommerce data layers. However, those without Shopify Plus may face a challenge since they cannot add the Google Tag Manager container code in the checkout pages. As a result, they are compelled to resort to using GTM in conjunction with the Google Channels App as an alternative solution.

The Google Channels App ensures tracking throughout the entire checkout process seamlessly. However, it is crucial to make a modification in the Google Analytics 4 configuration tag within GTM to prevent duplicate tracking of page views on the Shopify store. Since the Google Channels App already fires the pageview event, failing to adjust the tag could lead to redundant data being recorded.

Additionally, it’s essential to identify and remove any conflicting tags to avoid tracking the same ecommerce event twice. For the ecommerce events that cannot be tracked through a Google Channels App, GTM serves as a viable alternative to track them effectively.

Follow the setup process outlined below to seamlessly integrate GA4 with your Shopify store. Don’t miss out on the chance to leverage GA4’s advanced capabilities and secure the future of data processing for your e-commerce business. Embrace GA4 today and propel your online store to new heights of success!

How to Set Up Google Tag Manager (GTM) on Shopify?

Section 1: Place the customer details script and GTM container code in the “<head>” section of a theme.liquid file.

Step 1:

If you don’t already have a Google Tag Manager account, create a new one. If you already have an existing GTM account, please proceed by logging in.

Step 2:

Access “Admin” link, & from there, select “Install Google Tag Manager” option.

Install GTM

Step 3:

Copy the initial script of the Google Tag Manager container code, which contains instructions for pasting the code in the “<head>” section.

Install GTM with Code

Step 4:

Access your Shopify store by logging into your account.

Step 5:

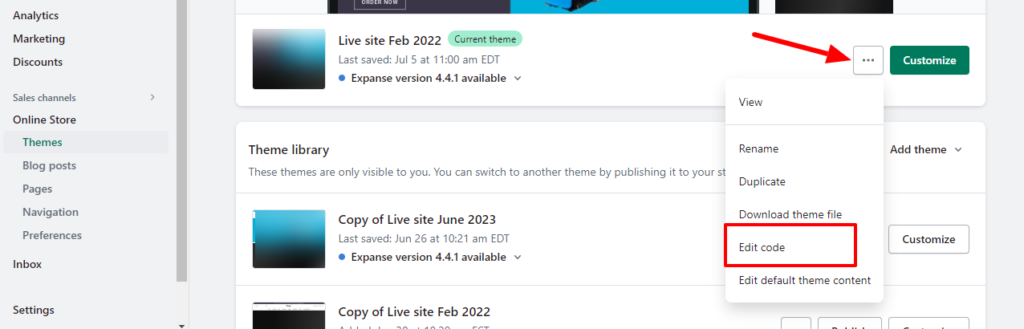
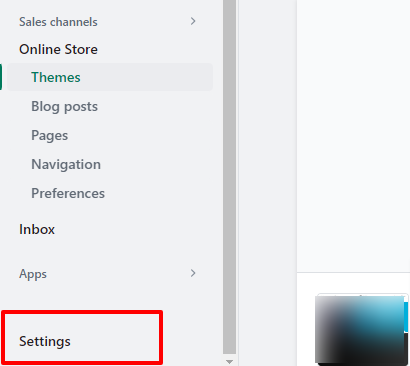
On the left side of the navigation panel, select “Themes” under the “Online Store” section.

Shopify Theme Option

Step 6:

Tap upon the three dots icon and then choose “Edit Code.”

Shopify Theme Option Edit Code

Step 7: 

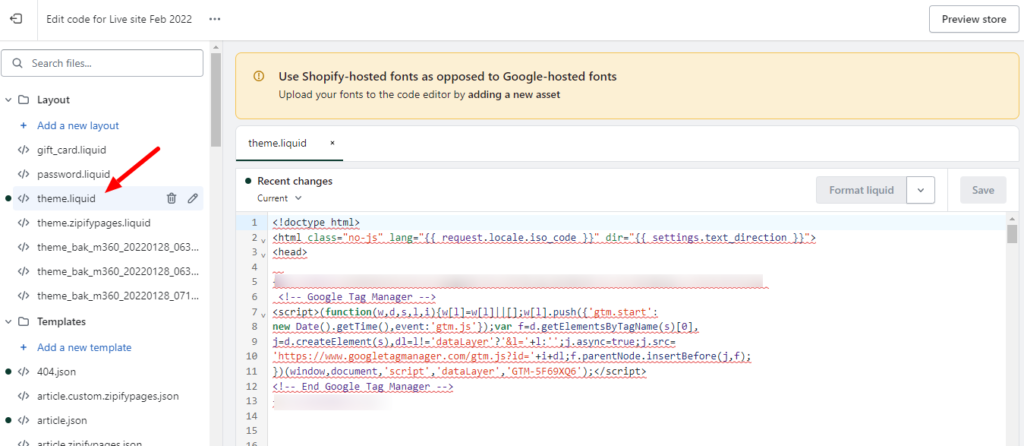
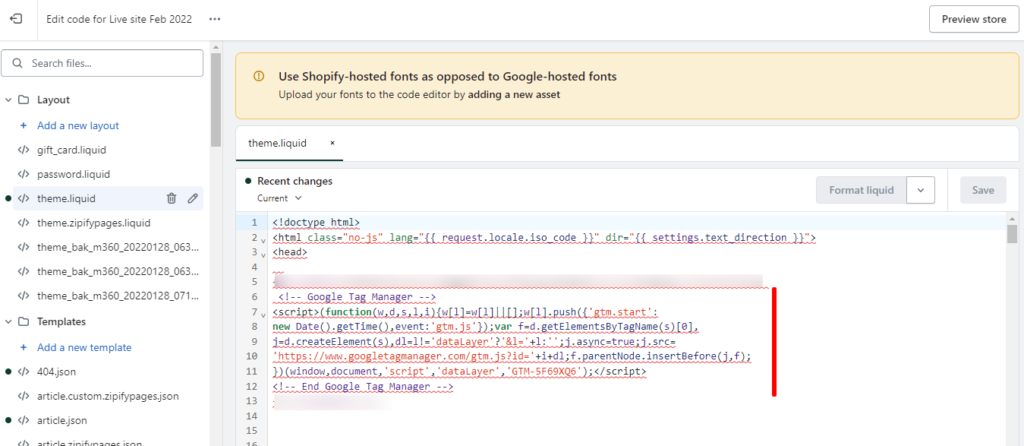
Select “theme.liquid” under the “Layout” section.

Theme Liquid Edit Code section


Step 8: 

Then, paste the GTM container code that you copied as high as possible within the “<head>” section of the page. Click on the “Save” button located in the top right-hand corner of the theme.liquid page.

GTM in Shopify Theme Liquid

Section 2: Place the customer details script and GTM container code in the “<head>” section of a checkout.liquid file.

Step 9 (elective/optional):

For Shopify Plus users, remember to add a Google Tag Manager container code in the the checkout.liquid file as well.

Step 10: 

Select the ‘Exit’ button located at the upper left-hand corner.

Shopify Theme Exit

Step 11: Navigate down and select ‘Settings.’

Setting Option in Shopify

Step 12: 

On the navigation panel located on the left side, select ‘Checkout.’

Checkout Option in shopify

Step 13: Navigate down and look for  the section “Order Status Page”

Checkout Tracking Scripts

Step 14:

Insert the GTM container code in the “Additional Script” section and then proceed to click on the “Save” button.

Adding GTM to Checkout Shopify

Step 15 (elective/ optional): For Shopify users with a standard version, access the GA4 property settings and find the “List Unwanted Referrals” option. Add both “myshopify.com” and custom domain (only if it’s applicable) to “List Unwanted referrals.”

Adding Shopify in exclusion list of refferer

By including these domains, it is ensured that checkout pages are not counted as self-referrals within the Google Analytics 4 reports.

Step 16: Launch Google Chrome browser and  from the provided link proceed to install Google Tag Assistant extension.

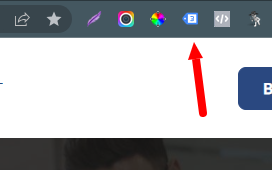
Step 17:  Go to the homepage of your Shopify store, & then locate the ‘Google Tag Assistant’ button located on top right side, beside the browser’s address bar. Click on the button.

Tag Assistant checking

In the section of ‘Result of Tag Analysis’, you should find a ‘Google Tag Manager’ tag which is listed with a blue or green icon next to it.

Checking GTM in extension

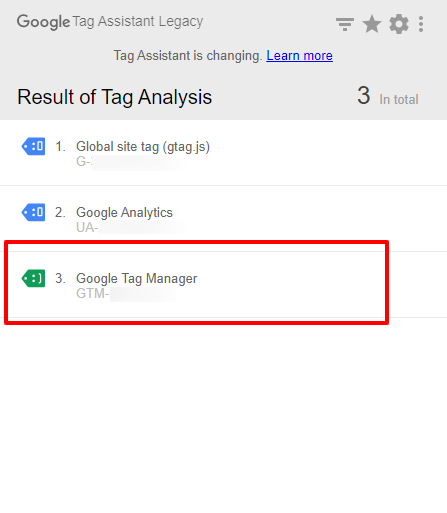
This indicates that GTM has been successfully installed in your Shopify store.

Please take note that the icons representing different colors (red, yellow, green, and blue) next to the identified tags each hold specific meanings.

Tag Assistant Colors indication

 Red or yellow shows that something is not right with GTM installation.

How to Install the Google Channels App on your Shopify Store?

Please follow the below outlined steps:

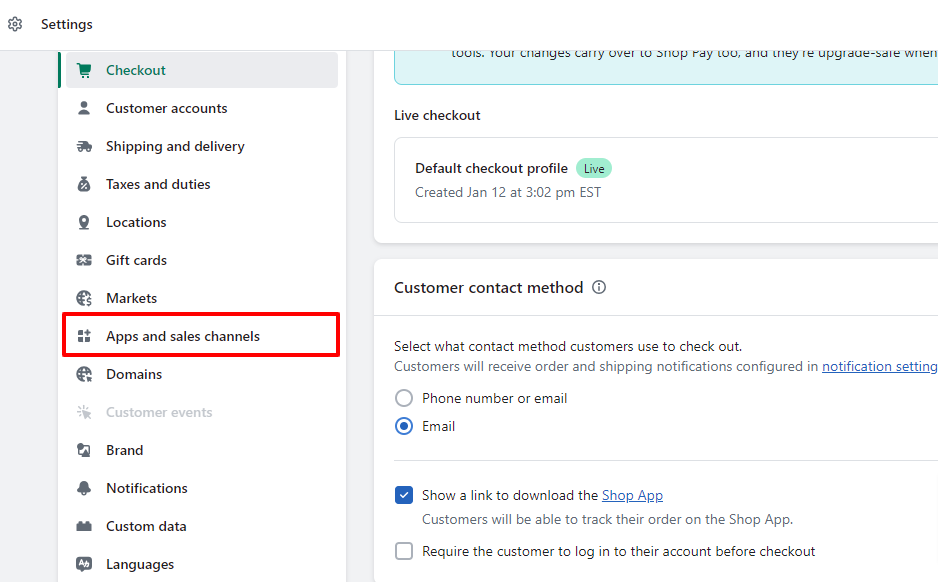
Step 1: Return to your Shopify store and select ‘Apps and Sales Channel’ from the ‘Settings’ menu.

App and sales channel option in Shopify

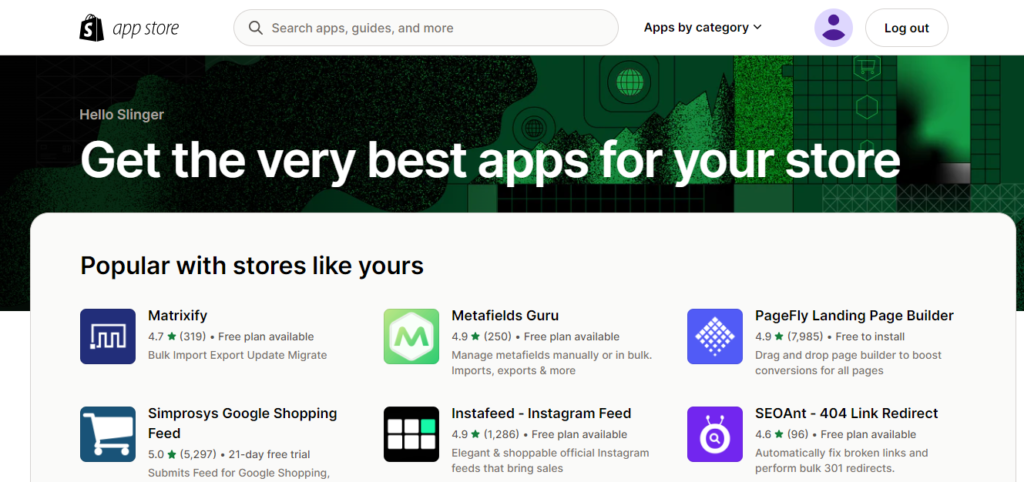
Step 2: Press the ‘Shopify App Store’.

Adding App in Shopify Store

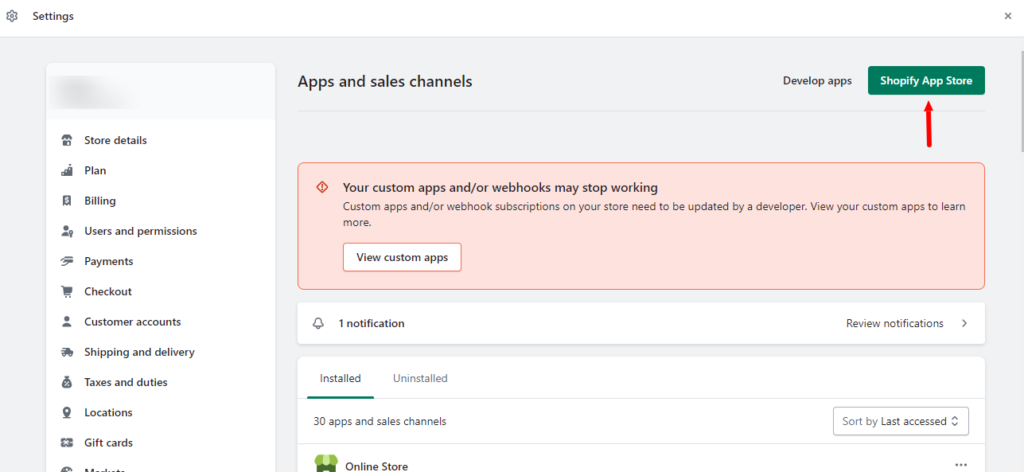
 This will take you to a screen similar to the one depicted below:

Shopify App store

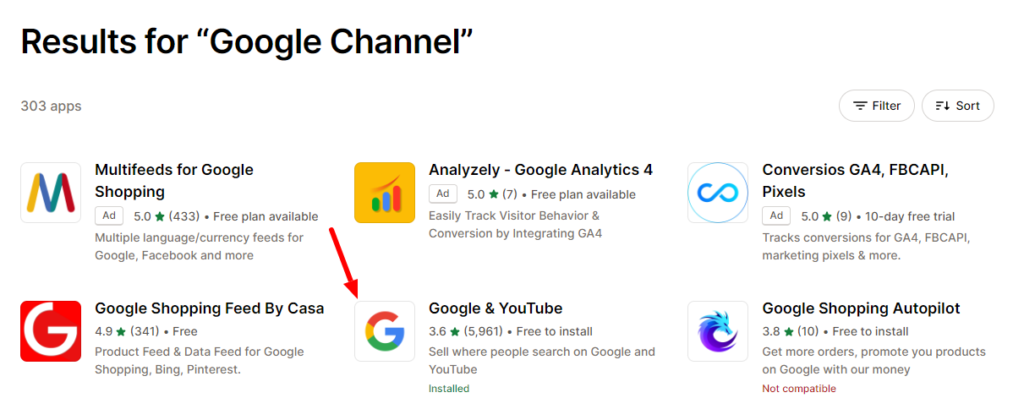
Step 3: Enter ‘Google Channel’ in the search bar and hit the enter key. This will display a screen similar to the one shown below.

Sales Channel app Search result

Step 4: Select ‘Google Channel’ from the search results.

Selecting Sales channel app

Step 5: Select ‘Add App’ icon.

Adding Google sales channel app in Shopify

Step 6: Then, Select  ‘Add Sales Channel’ icon.

Add app to sales channel

Step 7: Select “Connect Google Account”

Connecting sales channel app with Shopify

After connecting the google account to the shopify store, a screen similar to the one shown below will appear.

Shopify and Sales channel app connected

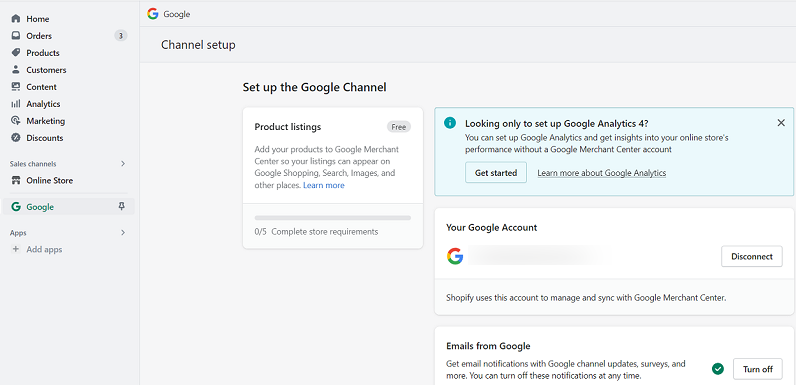
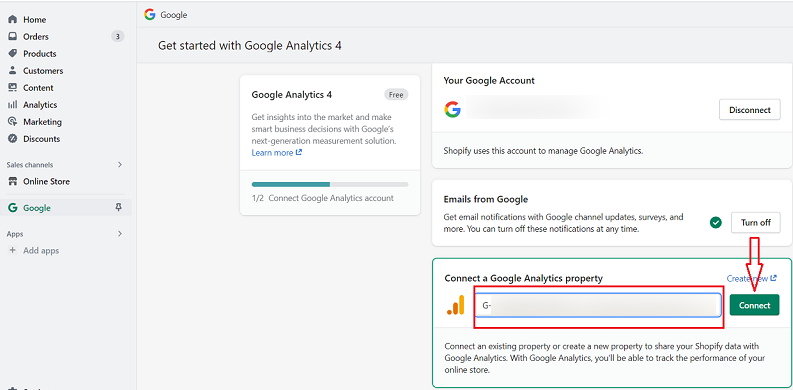
Step 8: Under section ‘Looking only to set up Google Analytics 4?’, select ‘Get Started’ icon.

Get started with GA4 in Shopify

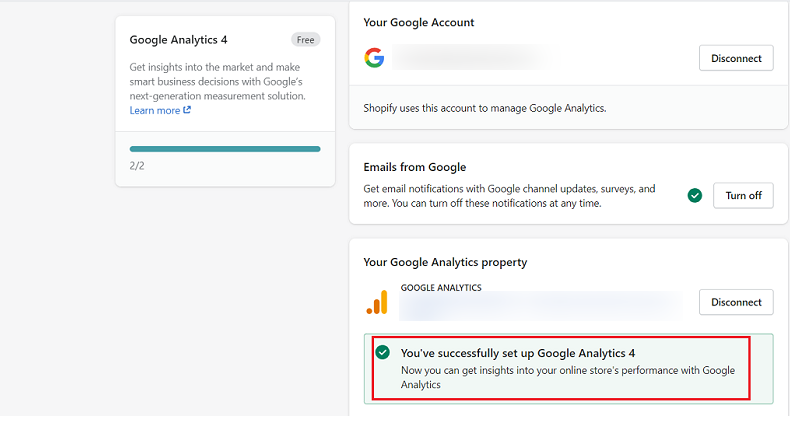
Step 9: Choose the GA4 property in a drop-down menu & then select the ‘connect’ icon.

Connecting GA4 with Shopify

You will now receive the text ‘You’ve successfully set up Google Analytics 4.’

GA4 connected with Shopify

How to Set up Your GTM for Google Channel App?

Step 1: Access your Google Tag Manager account and modify a GA4 Configuration tag to prevent it from firing page views in the Shopify store. 

Configuring GA4 base tag

This step is essential to avoid double tracking, as Google Channel App is firing pageview events already.

Step 2: Locate & remove all conflicting tags to avoid double tracking of the similar ecommerce event.

Step 3: Generate tags that will fire the given e-commerce events:

  1. remove_from_cart
  2. select_promotion
  3. add_shipping_info 
  4. view_item_list
  5. view_cart
  6. view_promotion
  7. select_item 

Google Channel App does not automatically track the given e-commerce events. Therefore, you need to configure tags in the GTM to track them manually.

Read also: Understanding Event Parameter in Google Analytics 4

How to Set Up Tracking for GTM + Google Channel App in the Shopify store?

 Step 1: 

 Search and eliminate any hard-coded data layers present in single or more than one of the theme files that pertain to the given below e-commerce events:

  1. add_to_cart
  2. add_payment_info
  3. purchase
  4. begin_checkout
  5. view_item

The Google Channel App automatically tracks these events, eliminating the need to manually fire them again. Therefore, there is no requirement to fire the given events twice.

Step 2: 

Incorporate data layers into the theme files that correspond to the given below e-commerce events.

  1. remove_from_cart
  2. add_shipping_info
  3. select_promotion
  4. select_item
  5. view_item_list
  6. view_cart
  7. view_promotion

 How to Test the Tracking Setup in GA4 Shopify?

To test the tracking setup in GA4 Shopify, follow these guidelines:

  1. Verify GA4 Property Configuration: Ensure that your GA4 property is set up correctly, and you have the tracking ID available.
  2. Install Google Tag Assistant:

Add the “Google Tag Assistant” extension to your Google Chrome browser. This tool helps you validate the firing of tags on your website.

  1. Test Pageview Tag:

Visit your Shopify store’s homepage and access the “Google Tag Assistant” extension. Check if the “Pageview” tag is firing. If it’s not, review your GTM setup for any potential errors.

  1. Test Purchase Event:

Perform a test purchase on your Shopify store. After completing the purchase, revisit the “Google Tag Assistant” extension and verify if the “Purchase” event is firing. Validate the associated data and parameters.

  1. Real-Time Reports in GA4:

Log in to your Google Analytics 4 account and navigate to the “Real-time” section. Check if the pageviews and purchase events are being recorded in real-time following your interactions on the website.

  1. Review GTM Debug Logs:

Enable the “Preview” mode in Google Tag Manager and engage in various actions on your store. Inspect the debug console to identify any potential errors or unexpected behavior in the tags and triggers.

  1. Analyze GA4 Data:

Once the tests are complete, examine your GA4 reports to ensure accurate and precise tracking of data from your store’s activities.

By diligently following these steps, you can confidently verify the accuracy and efficiency of your GA4 Shopify Tracking setup, ensuring it captures essential data from your store accurately. 

Read Our Latest Guides:

  1. What are The Benefits Server-Side Tracking
  2. Data Filters In Google Analytics 4
  3. Google Ads Conversion Tracking Vs All Tracking

Leave a Comment

Your email address will not be published. Required fields are marked *

Scroll to Top